
Create Easy DIY Home Decor

If you want to know how to make decorative things at home then you are in the right place!
Published at:
Apr 29, 2026 yearUpdated at:
Apr 29, 2026 yearAuthor:
KarolinaReviewer:
MarkRate:
Table of content
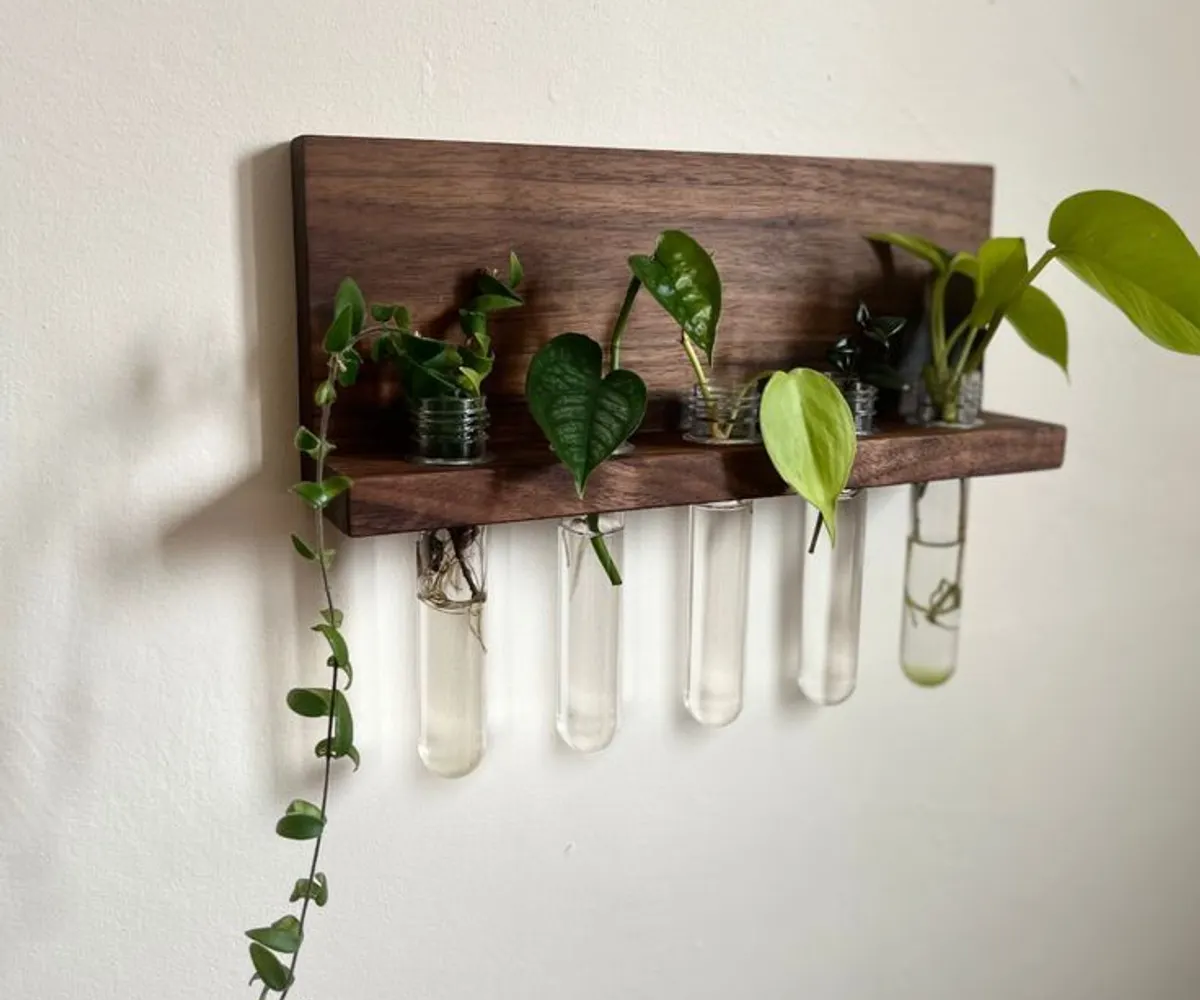
DIY Decorative Flower Shelf: A Step-by-Step Guide
Creating your own decorative flower shelf is a fun and rewarding project that can brighten up your living space.
Not only does it allow you to showcase your favorite plants, but it also adds a personal touch to your home decor. In this article, we’ll guide you through the steps to make a beautiful DIY flower shelf.
Step 1: Plan Your Design
Before cutting any wood, sketch out your design. Consider the following:
- Size: Determine how large you want your shelf to be and how many tiers you want.
- Shape: You can opt for a traditional rectangular shelf or get creative with shapes like a triangle or a ladder design.
- Placement: Choose where you want to hang the shelf and measure the space to ensure a good fit.
Step 2: Cut the Wood
Once you have your design, it’s time to cut the wood:
- Measure and mark the dimensions of your shelf on the wood boards.
- Use a saw to cut the pieces. Common dimensions for a tiered shelf might be 24 inches long by 8 inches deep for each tier.
- If you’re making a multi-tiered shelf, cut the vertical supports accordingly.

DIY wooden shelf
Next Steps
Step 3: Sand the Edges
After cutting, use sandpaper to smooth out the edges of the wood. This step is crucial to avoid splinters and to give your shelf a polished look.
Start with medium-grit sandpaper to smooth out rough edges.
Finish with fine-grit sandpaper for a smooth surface.
Step 4: Assemble the Shelf
Now, it’s time to assemble your shelf:
- Lay out the pieces as per your design.
- Use wood glue to attach the vertical supports to the base.
- Secure with wood screws for added stability. Make sure to drill pilot holes first to prevent the wood from splitting.
- For multi-tiered shelves, attach each tier to the vertical supports, ensuring they are level.
Step 5: Finish the Shelf
Once the shelf is assembled, you can finish it:
- If you’re using wood stain or paint, apply it with a paintbrush. Allow it to dry completely.
- Optionally, you can apply a coat of clear sealant to protect the finish.
Step 6: Hang the Shelf
To hang your shelf:
- Find wall studs for secure mounting and use a level to ensure it’s straight.
- Use wall anchors if you can’t find studs or if the shelf will hold heavier plants.
- Mark the spots for your screws, drill holes, and mount the shelf.
Step 7: Decorate with Flowers
Now for the fun part! Arrange your favorite plants on the shelf. Consider mixing different heights and types of plants for an eye-catching display. Don’t forget to add decorative pots that complement your shelf’s design.
Perfect solutions for everyone
Even though every household memeber will love our products, we know how intimidating it can be to plan the whole space by yourself. That is why we offer our 3D room planing, styling advices, product recommendations & much more.
Sign up for consultationsAbout the author

Karolina
Interior Designer
Karolina is an interior designer with 15 years of experience